If you have chosen on-site sawmilling, preparing the site ahead of time helps us work safely and efficiently. The better the setup, the more productive your milling time will be.
Quick Prep Checklist
On-site milling works best when the site is prepared before we arrive. Use this quick checklist to confirm your site is ready to go. More detail on each item can be found in the sections below.
Confirm the truck and mill can access the work area.
Make sure the setup area is relatively flat and level.
Stage logs together if possible.
Have equipment available if logs need to be moved.
Decide what each log should be cut into.
Prepare a level stacking area/pallet before milling begins.
Have stickers, or lumber to cut stickers, ready.
Line up help for pulling boards and stacking lumber if possible.
Have a plan for sawdust.
Review the current price list for travel, setup, milling, and related services.
If you have questions about any item on the checklist, contact us before scheduling or before your appointment so we can help you plan the best setup.
Ideal Site Setup
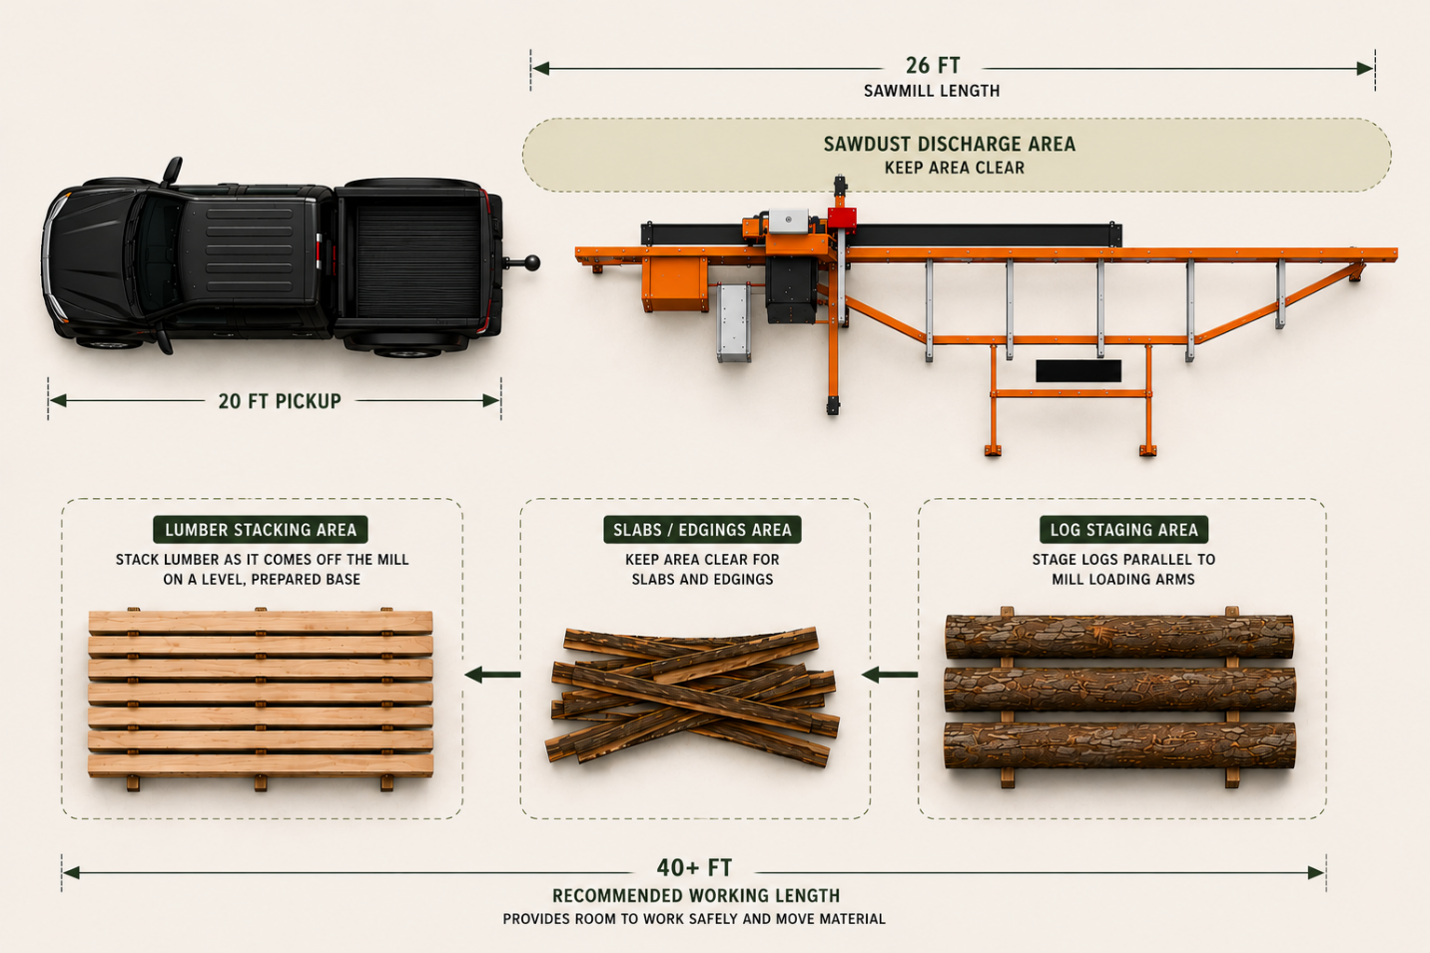
The truck and sawmill need clear access to the work area. Keep in mind the truck is approximately 20 feet long, and we need enough room to maneuver both the truck and mill into position. The setup area should be relatively flat and level, with logs staged where they can be loaded efficiently and a clear pathfor lumber to come off the mill and be carried to the stack.
Shade is appreciated when available, but access, level ground, and safety come first.
The following diagram shows the ideal setup:
Log Preparation
Stage logs in one location when possible. If a tree service is involved, ask them to stage the logs in one accessible pile for milling. Keep logs as clean as possible; mud, dirt, and metal can slow milling and damage blades.
If logs were cut within the last couple of weeks, especially during warmer or drier weather, we recommend end sealing them as soon as possible to reduce end checking. Anchorseal is ideal for end sealing, but paint can help in a pinch.
If logs cannot be rolled or loaded directly onto the mill, have equipment available to move them. Moving the mill from log to log may be possible if there is enough room, but each move can add approximately 20–30 minutes.
Lumber Stacking Preparation
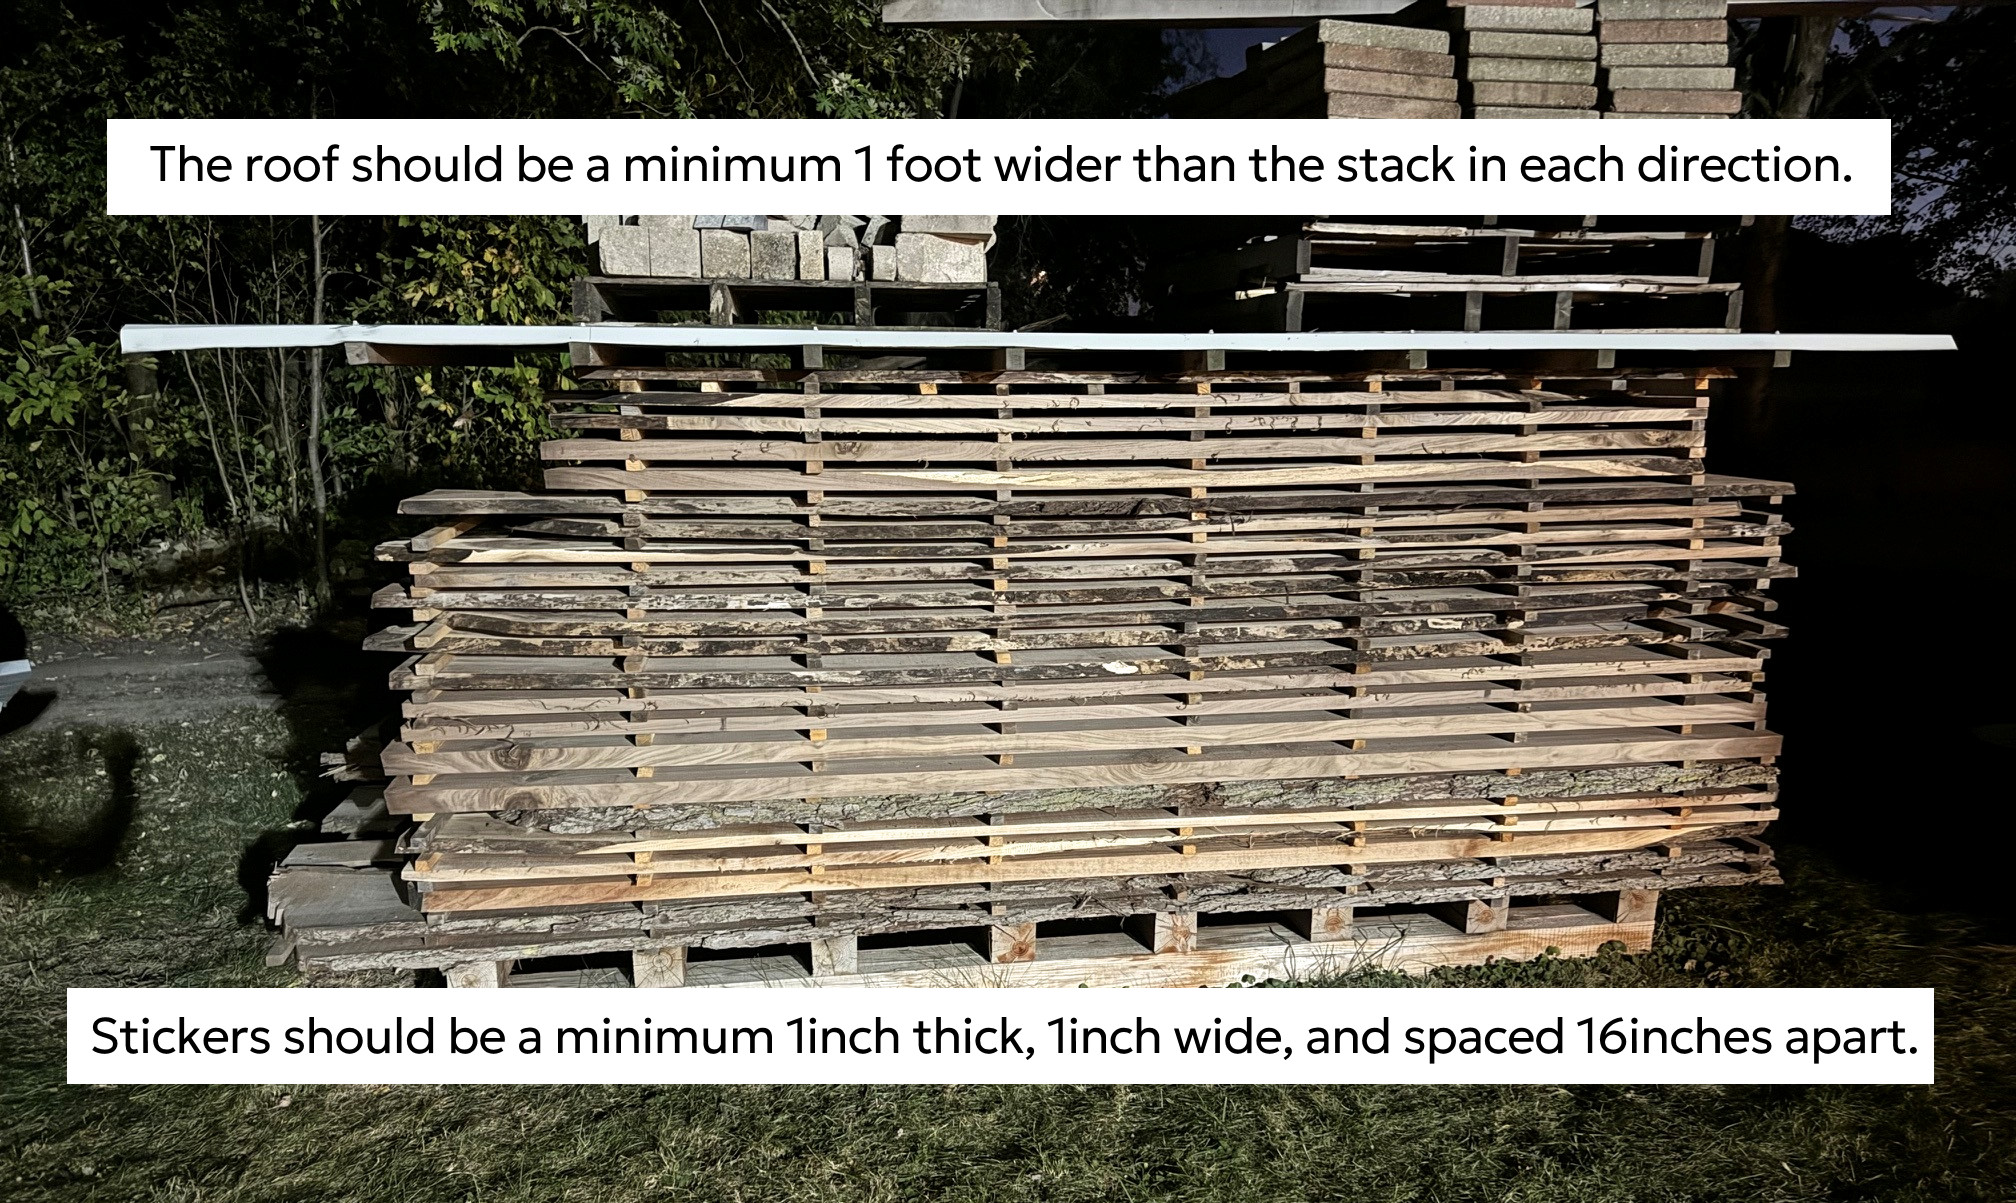
Fresh lumber should be stickered and stacked as it comes off the mill. Choose a level stacking area before we arrive. A good setup is 6x6s running lengthwise with 4x4s placed at sticker spacing across them, creating a level base for the lumber stack. Salvaged pallets can work if they are stacked a few high, are the same height, and are shimmed level so the lumber stack stays flat.
If you cannot raise the lumber stack off the ground as planned, tarps or heavy garbage bags can help create a temporary moisture barrier. Depending on the species and weather, fresh lumber may need protection from sun and wind. Some species, especially oak, can be damaged quickly; in the wrong conditions, fresh oak lumber can be ruined in a matter of hours.
To prepare stickers ahead of time, we typically recommend dry stickers 1 inch x 1¼ inches x 48 inches. Many customers cut stickers ahead of time from old dry lumber or inexpensive dry lumber from a home store. If needed, we can cut stickers on the mill from suitable lumber, but doing this ahead saves milling time. Cutting stickers from the logs being milled is possible, but it is not ideal because green stickers can contribute to staining and use up potentially valuable lumber.
Visual recommendation for stacking freshly cut lumber:
Labor, Equipment, and Sawdust
Extra help makes a big difference. Having someone pull boards and stack lumber can significantly speed up the job. We can help with stacking, but it will slow the milling process. If equipment is needed to move logs, please have it ready before we arrive.
Portable sawmilling creates a large amount of sawdust. If you want to collect sawdust or protect the ground, please have a plan in place before milling begins. Some species' sawdust can harm or kill grass if left in place, especially if the milling site is on a lawn. If you want to manage sawdust more actively, the mill can accept a 4-inch dust collection hose.
If You Will Not Be Present
If you will not be available during milling, please provide clear cutting instructions ahead of time. A cut sheet for each log is recommended so we know what thicknesses, widths, slabs, beams, or project pieces you want from each log.
Questions About Your Setup?
If you are unsure whether your site is suitable or ready for portable sawmilling, contact us. We are happy to talk through access, staging, stacking, stickers, sawdust, or anything else that may affect the job.